For the sides of my first guitar I chose American mahogany. The reason was simple: it’s a wood that forgives mistakes. It bends predictably, doesn’t tend to crack around small knots or grain runout, and it looks exactly the way the body of a D-18-style instrument should look. This is my first instrument and my first bend, so I didn’t want to fight a new technique and a temperamental species at the same time.
I started by rough-cutting both sides to shape, deliberately leaving some margin — the final edge profile, the one that follows the arch of the top and back, will only be sanded in later on the radius dish, once the sides are glued into a rim. At this stage the point was simply to get rid of the excess material and have something to work with. I cut them on the bandsaw — this is where the Sabre 250 proved indispensable.
Then thickness. The sides came down to a target of 2.1 mm, with a hand plane and a cabinet scraper. I checked them with a micrometer every few centimetres, because mahogany can vary in hardness along the board and it’s easy to overdo it in one spot and leave too much in another. A thinner side bends more willingly, but go too thin and it starts to ripple and lose stiffness — I was looking for the middle ground.
And finally, bending on the bending iron. This was the moment I’d been looking forward to the most and dreading the most. I dampened the wood, heated the iron and started at the waist — the tightest curve, the one that sets the shape for everything else. Only then the upper and lower bouts. I worked slowly, without forcing it: at some point the side simply starts to “flow” under your fingers and takes the curve on its own. Every so often I held it against the mold to make sure I wasn’t overbending.
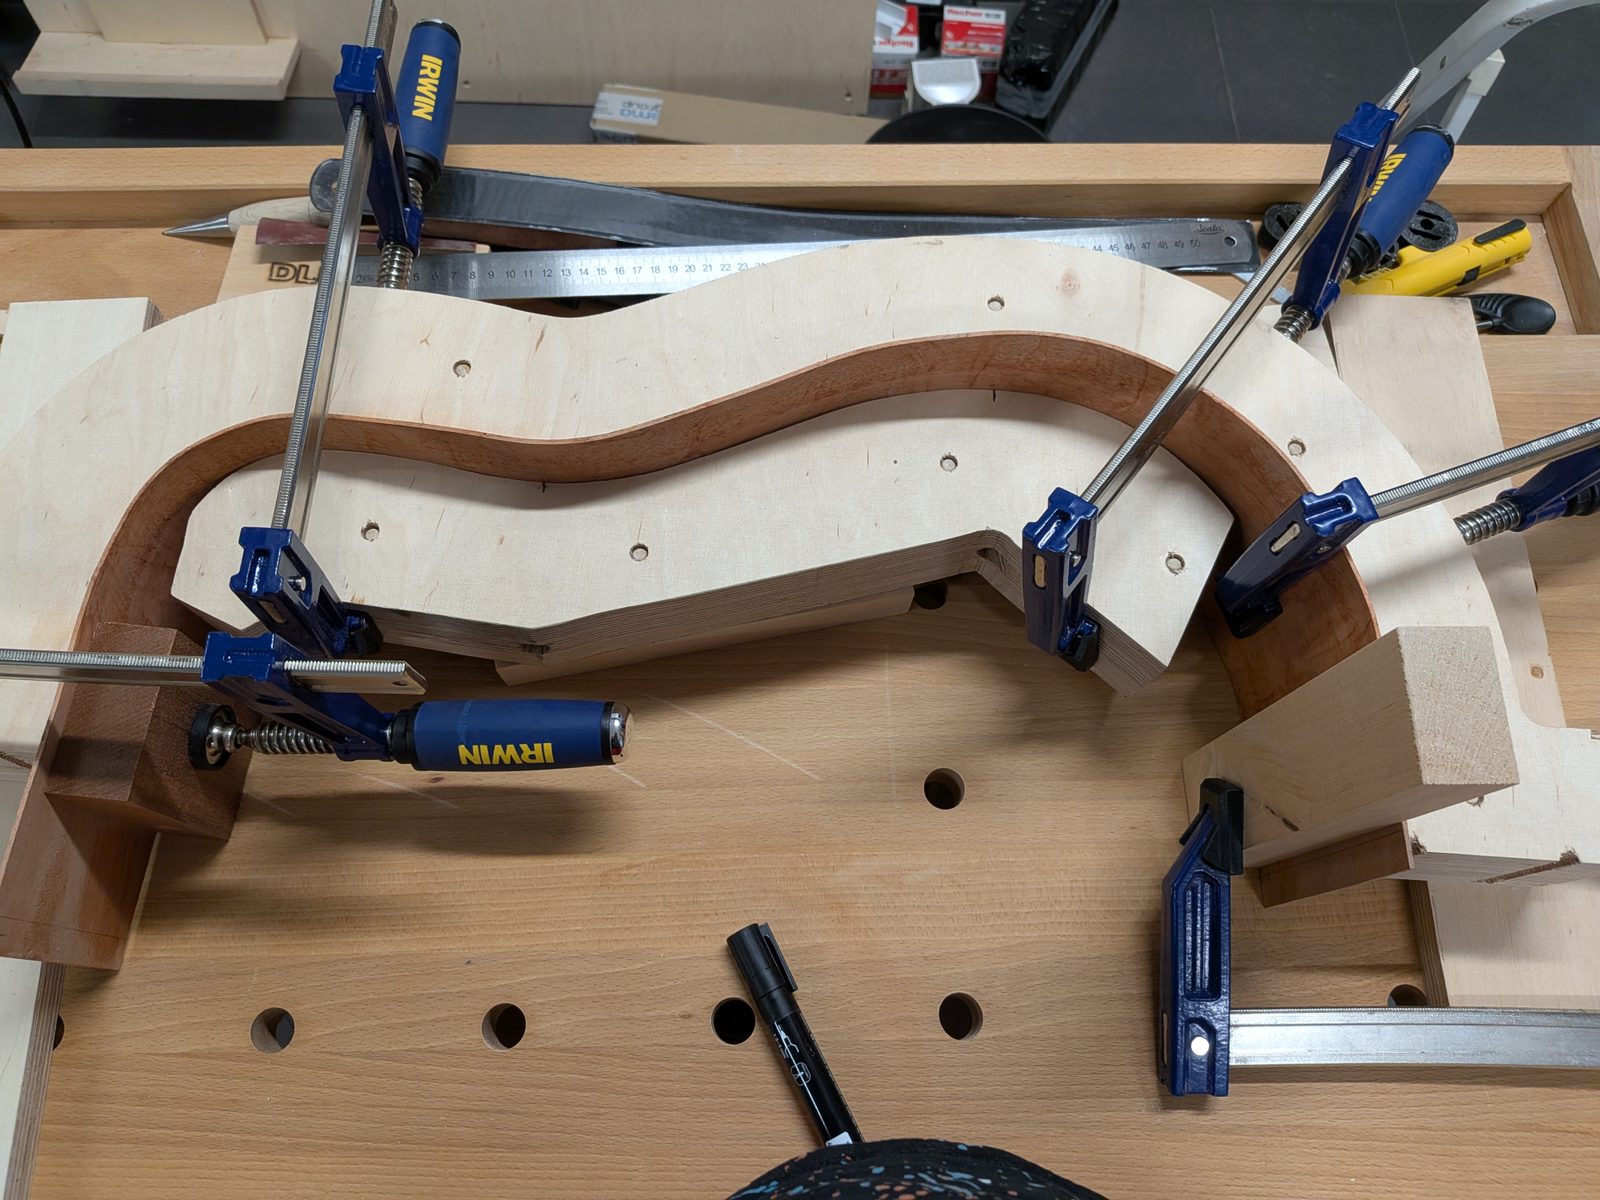
After bending, I didn’t leave the sides loose. I put them straight into the body mold, clamped them with spreaders and left them to cool. Wood has a memory after bending — if it cools unsupported, part of the curve springs back and needs correcting. In the mold it sets in shape for good. When I took them out, they held the profile almost perfectly. For a first attempt, I’m very happy with the result. Turns out the fear was bigger than the thing itself ;)
Next step: trimming the sides to length, then making and gluing the neck block and tail block.